Because long forms can be intimidating and deter potential leads from engaging with your website, the leadstreet Module Multi-Step Form for HubSpot, transforms this daunting task into an engaging and user-friendly experience. We share how to create multi step form in html with the guide below.
Key Features
- Grouping as many form fields as you desire
- Customizing the form width, spacing and padding
- Toggling the visibility of the steps and progress indicators
- All the advanced features of a HubSpot form, including form validation, email filtering, and more
- Two configurable layouts available for the module
- Customizing additional actions once the form is submitted
How does the multi-step form custom module work?
Here's the secret behind the magic. Without it, our multi-step module wouldn't work. But don't worry! The steps are a breeze, as explained below.
Step 1: Purchase the multi-step form custom module for HubSpot.
Step 2: Construct the Multi-Step Form.
Begin by creating the multi-step form using leadstreet's Module for HubSpot.
To learn more about creating a form, please refer to the HubSpot Knowledge Base article on how to create a form.
Important:
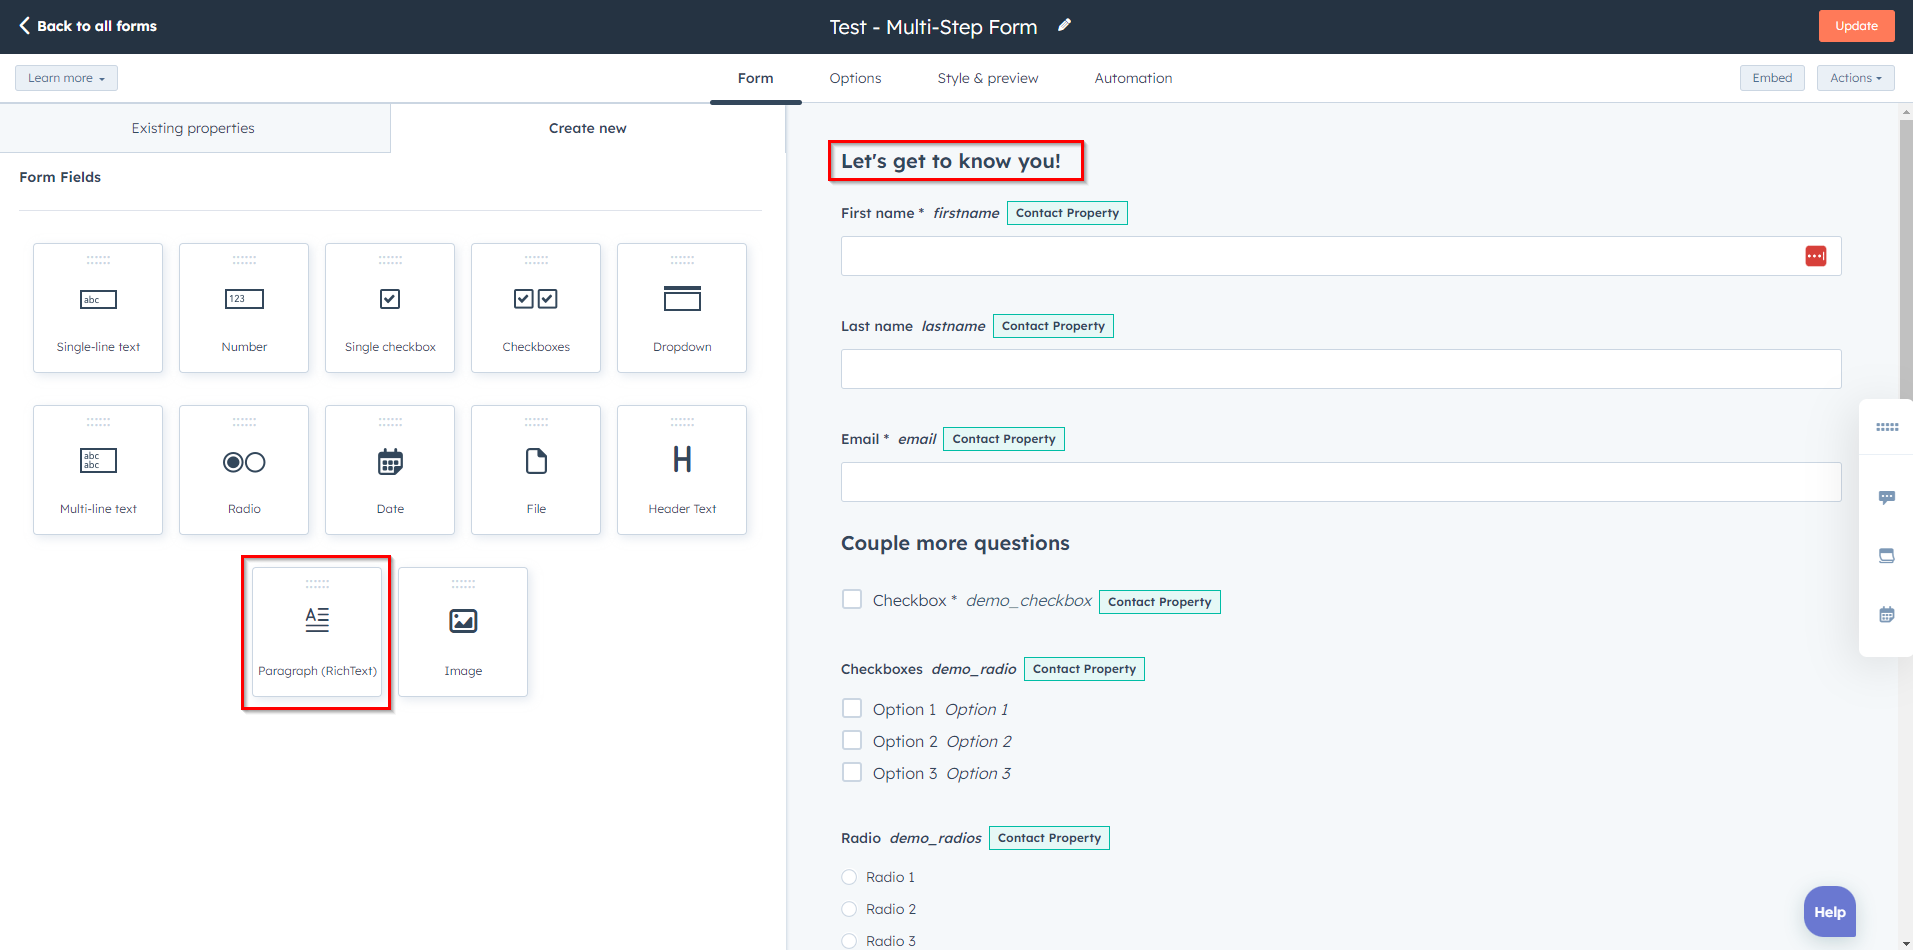
Insert a paragraph-rich-text between the form fields you want to group together. This step is crucial for the module to work properly. The paragraph-rich-text fields determine the different sections/chapters of your multi-step form.
Add the necessary fields to your form and group the form fields you want, by adding paragraph-rich-text between them. The paragraph-rich-text content should be informative and provide context for the upcoming section of the form. It acts as a brief guide to what users can expect in the next step.
Note:
The Notice and consent / legitimate interest (GDPR) will always be displayed below the form. There is no need to create a separate section (through a paragraph-rich-text) for it.
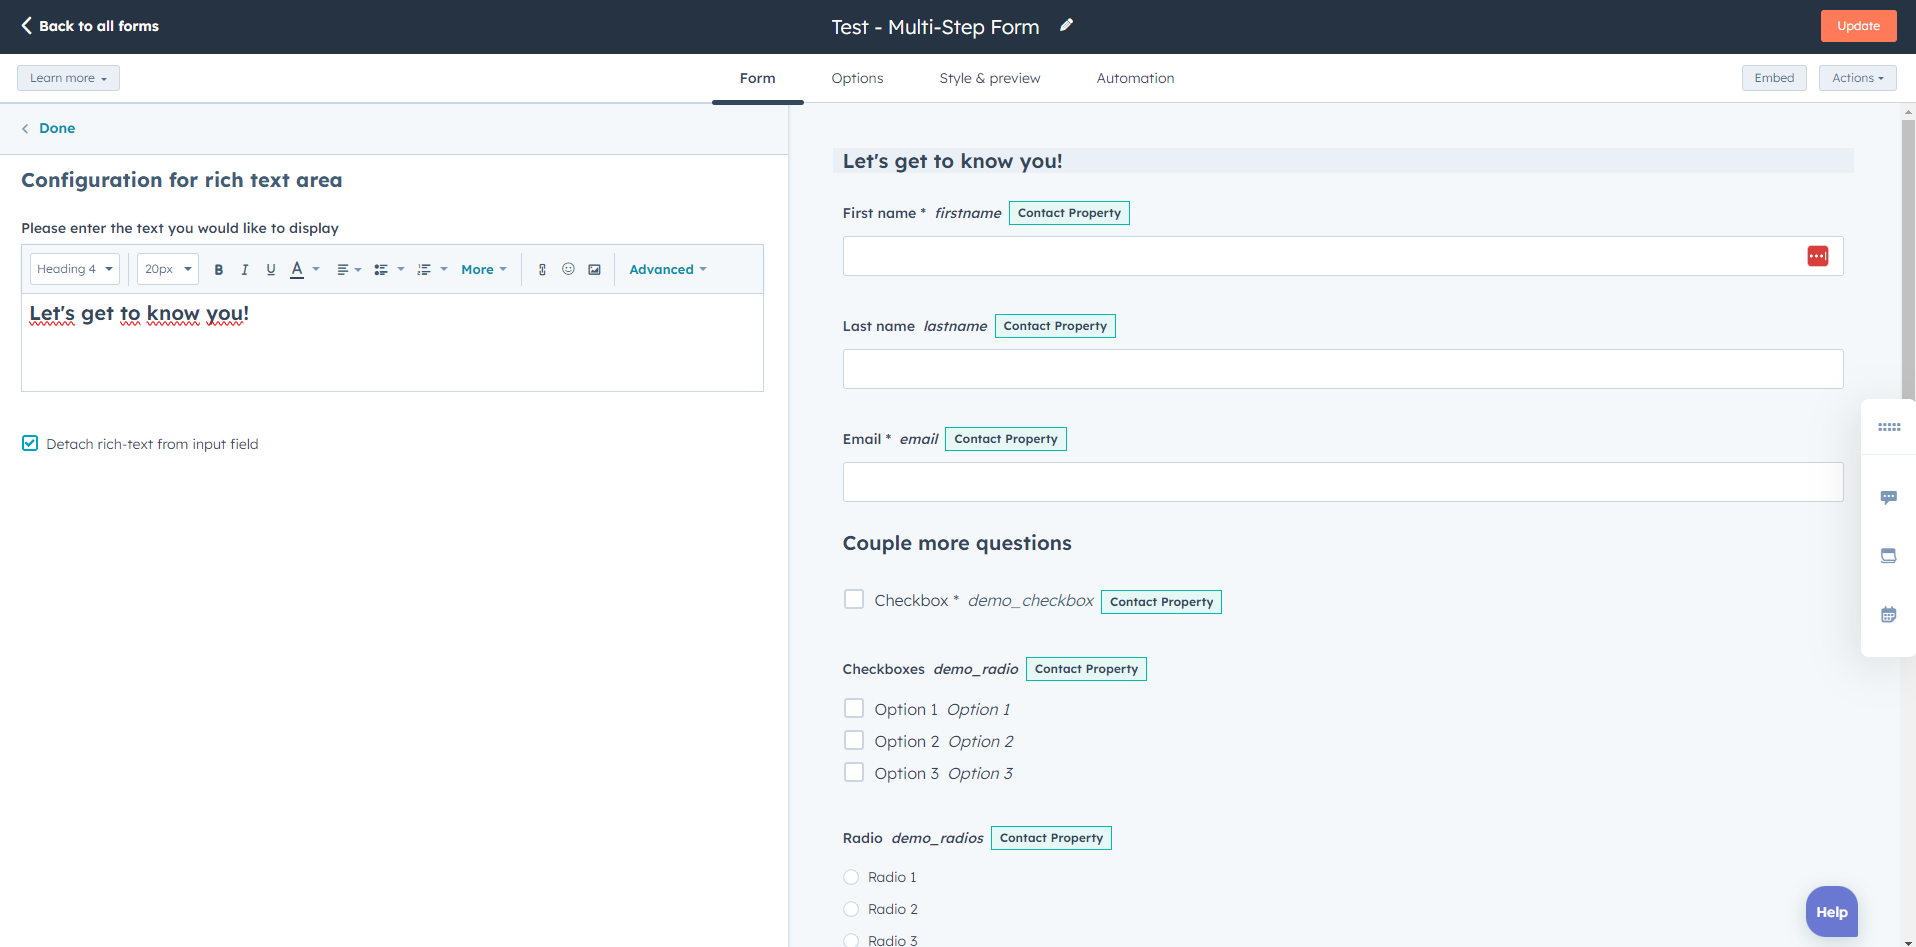
Customize the rich text area based on your preferences. You can:
- Personalize the text
- Include an image, emoji, hyperlink, and more.
Once you have finalized your configuration, go ahead and publish your form so that it can be selected for the multi-step form module.
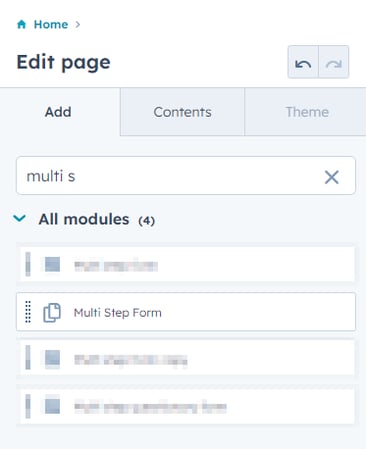
Step 3: Add the multi-step form module to your webpage.
Log into your HubSpot portal. Go to your desired webpage. Add the multi-step form custom module for HubSpot by dragging and dropping there.
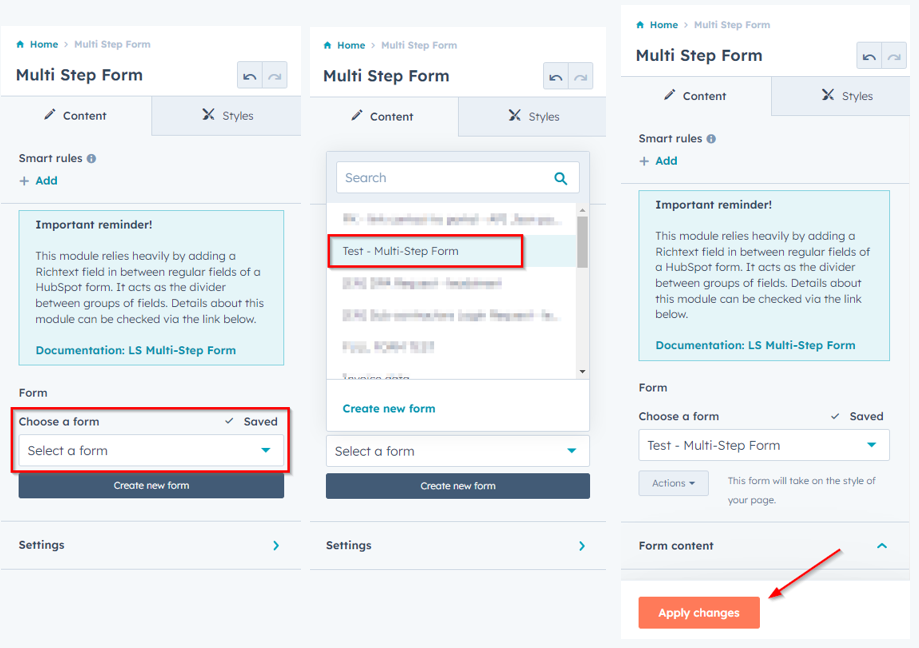
Select the form you want to use or create a new one and apply changes
Step 4: Customize the options according to your preferences.
Customize the settings of the multi-step module to suit your preferences. You have the option to:
- Hide the title of each step
- Adjust the width of the form
- Choose different colors based on our branding guidelines and more.
All form fields are displayed beneath the form content. Additionally, you have the flexibility to include additional fields if desired.
Next, define the submit button and set your GDPR options.
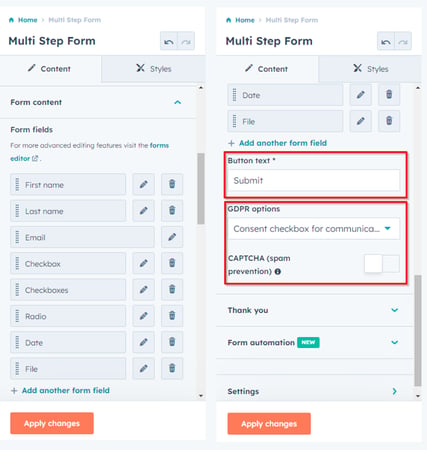
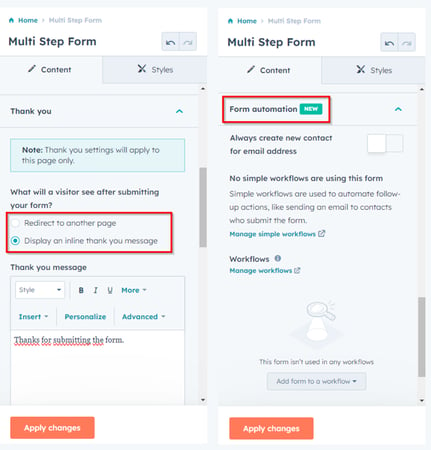
You have the flexibility to choose whether you would like to display an inline thank you message or redirect the user to a thank you page. Additionally, you can add form automation if you wish to further streamline the process for your multi-step form.
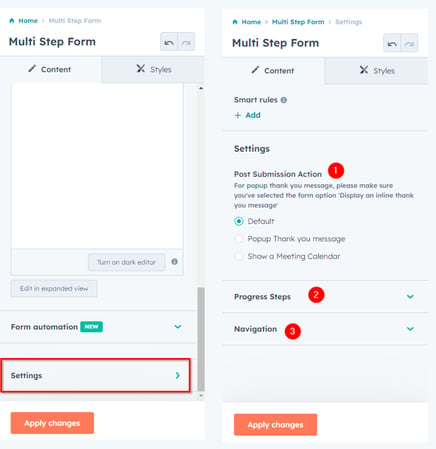
Choose settings to define:
- Post submission action
- Multi step for progress Steps
- Navigation
How to set up post-submission actions
To set up actions for after people submit on your multi step form:
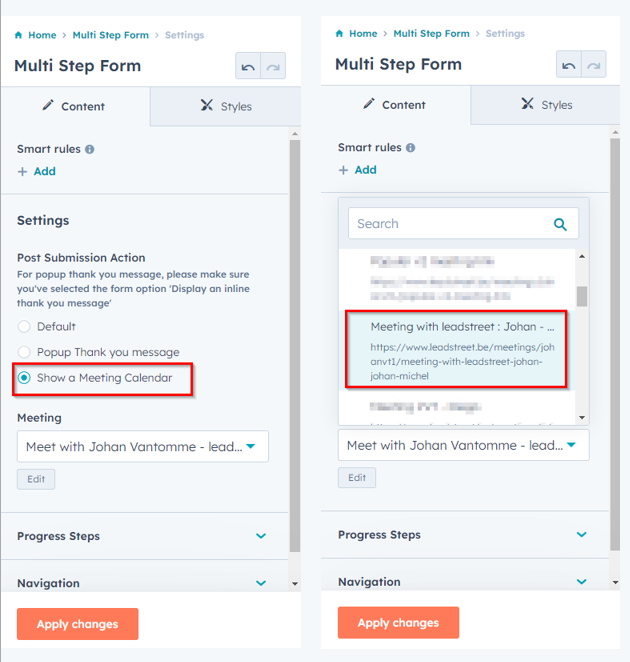
- Select the default option to either display an inline thank you message or redirect your visitor to a thank you page, as previously defined.
- Choose the Popup Thank you message option if you would like to show a popup to express gratitude to your visitor. The text displayed on the popup is the text that you specified in the rich-text-field in the previous step.
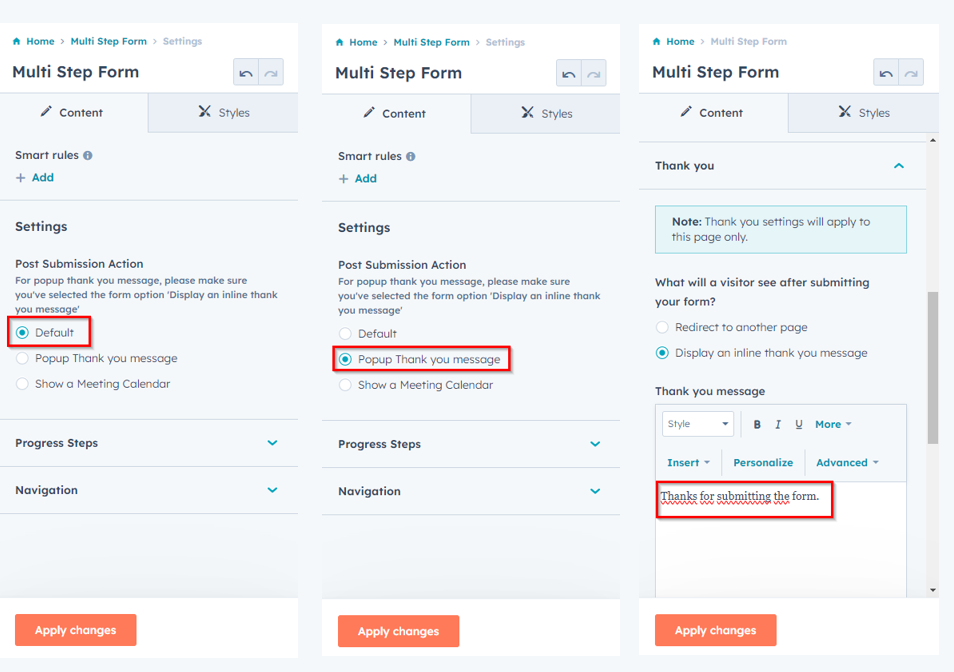
- Display a meeting link after the form submission. Simply choose a meeting link that you have pre-defined.
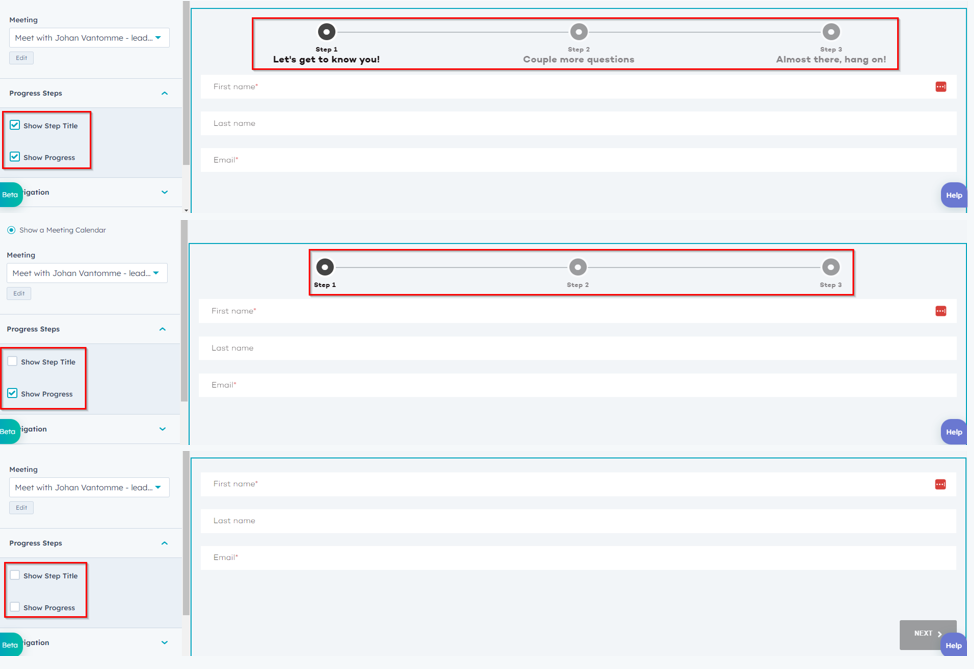
How to up progress steps
On the left-hand side of the editing page of your multi step form, under Progress steps you can:
- choose whether to display the step titles and/or the progress
- or choose to hide the step titles
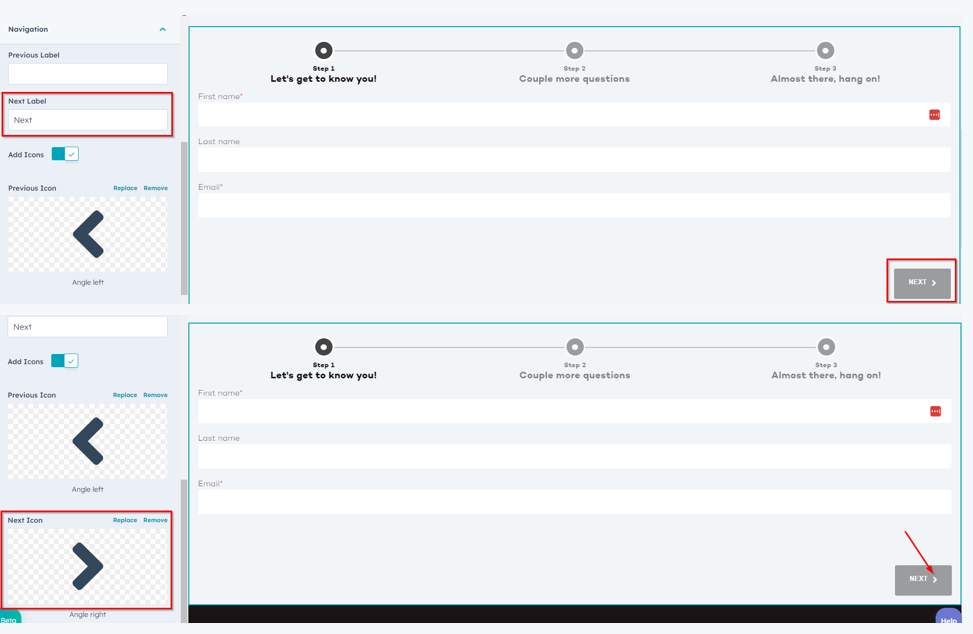
How to set up navigation
You can specify the navigation labels and icons to guide users through the multi-step form.
- Edit/customize the labels for next on the left-hand side.
- Replace the icons under each step on the left-hand-side.
How to customize the style to match your preferences and website page layout
On the left-hand side of your multi step form custom module for HubSpot, you can:
- Select the option to display the multi-step form in a full-width layout
- And specify the position of the progress bar using columns in your multi step form.
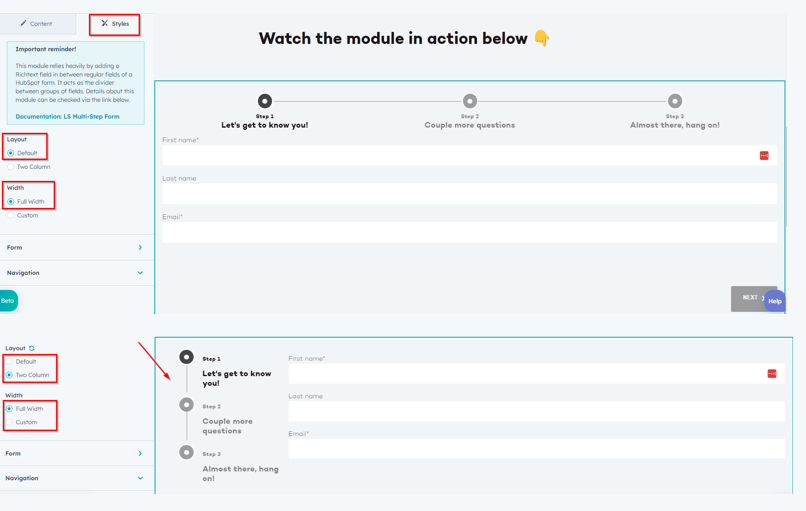
Or you can choose a custom width layout for the multi-step form.
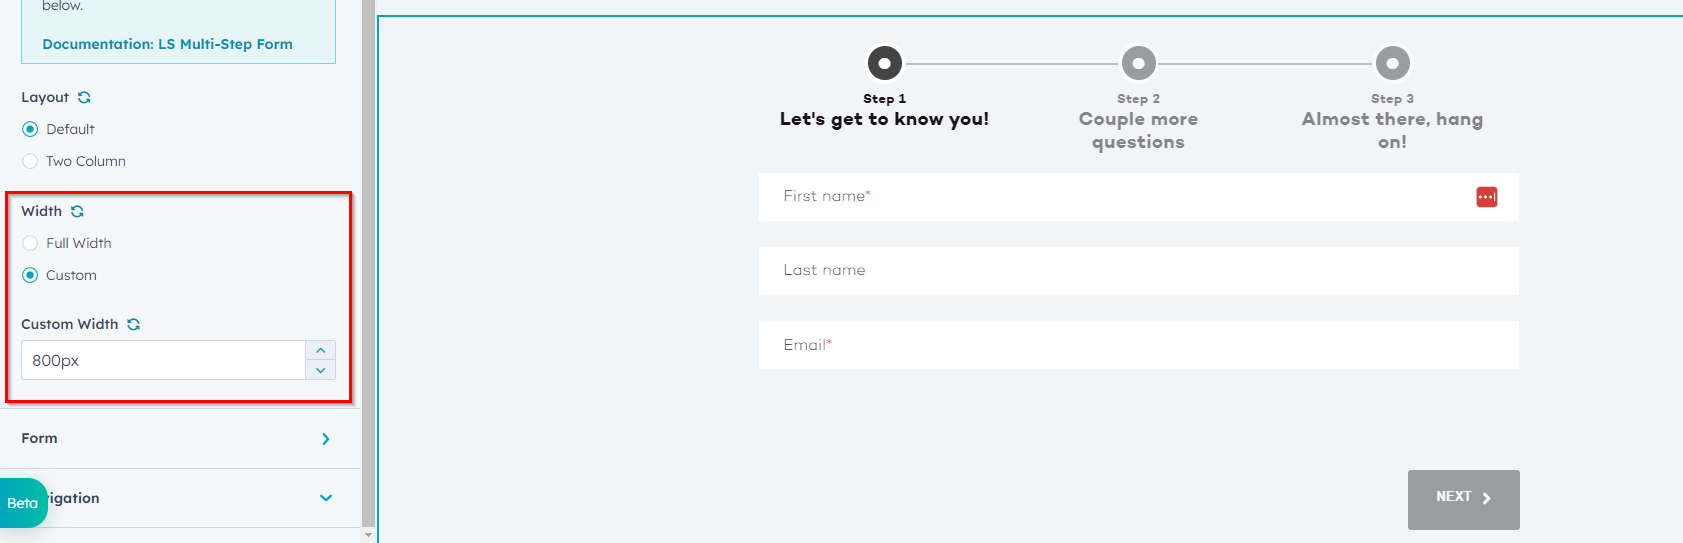
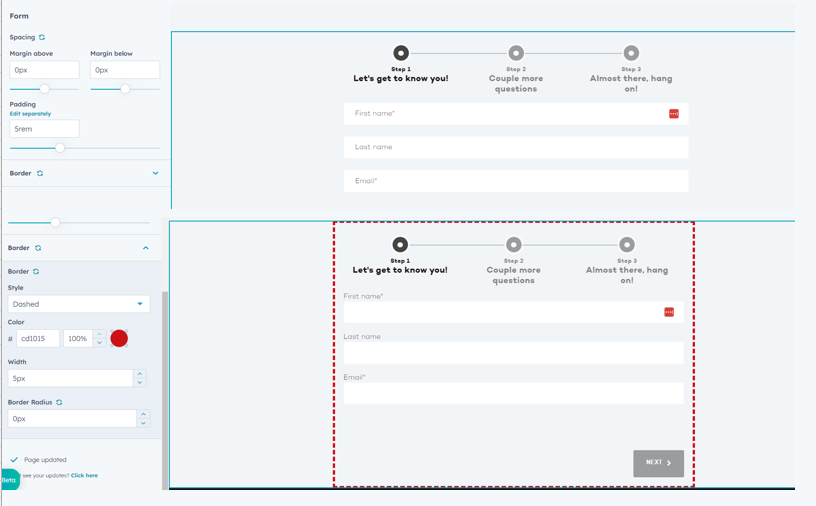
From there, you can specify the spacing, padding, and border on form level to customize its appearance. To do this, follow these steps:
Step 1: Choose Form in the style menu.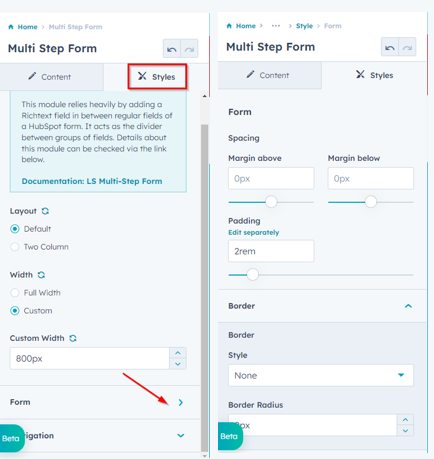
Step 2: Define your preferences for spacing, padding, and border.
How to customize the design of the navigation process bar
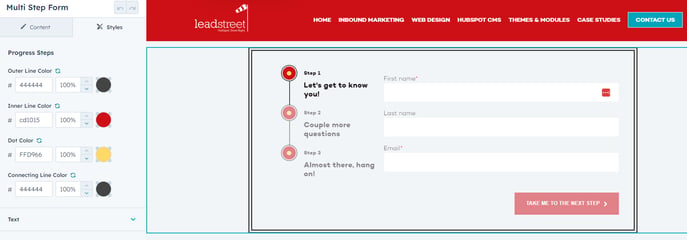
You can customize your multi step form to match the colors in your branding guidelines. Go to Styles on the left hand and choose different colors for:
- Outer lines
- Inner lines
- Dots
- Connecting lines
Congratulations!
You just finished the setup of the Multi-Step form module for HubSpot.
Any Questions
Please contact our support team via this form